> ## Documentation Index
> Fetch the complete documentation index at: https://hbx-docs.uplifthub.io/llms.txt
> Use this file to discover all available pages before exploring further.
# Select Package
export const Ui = ({children}) =>
{children}
;
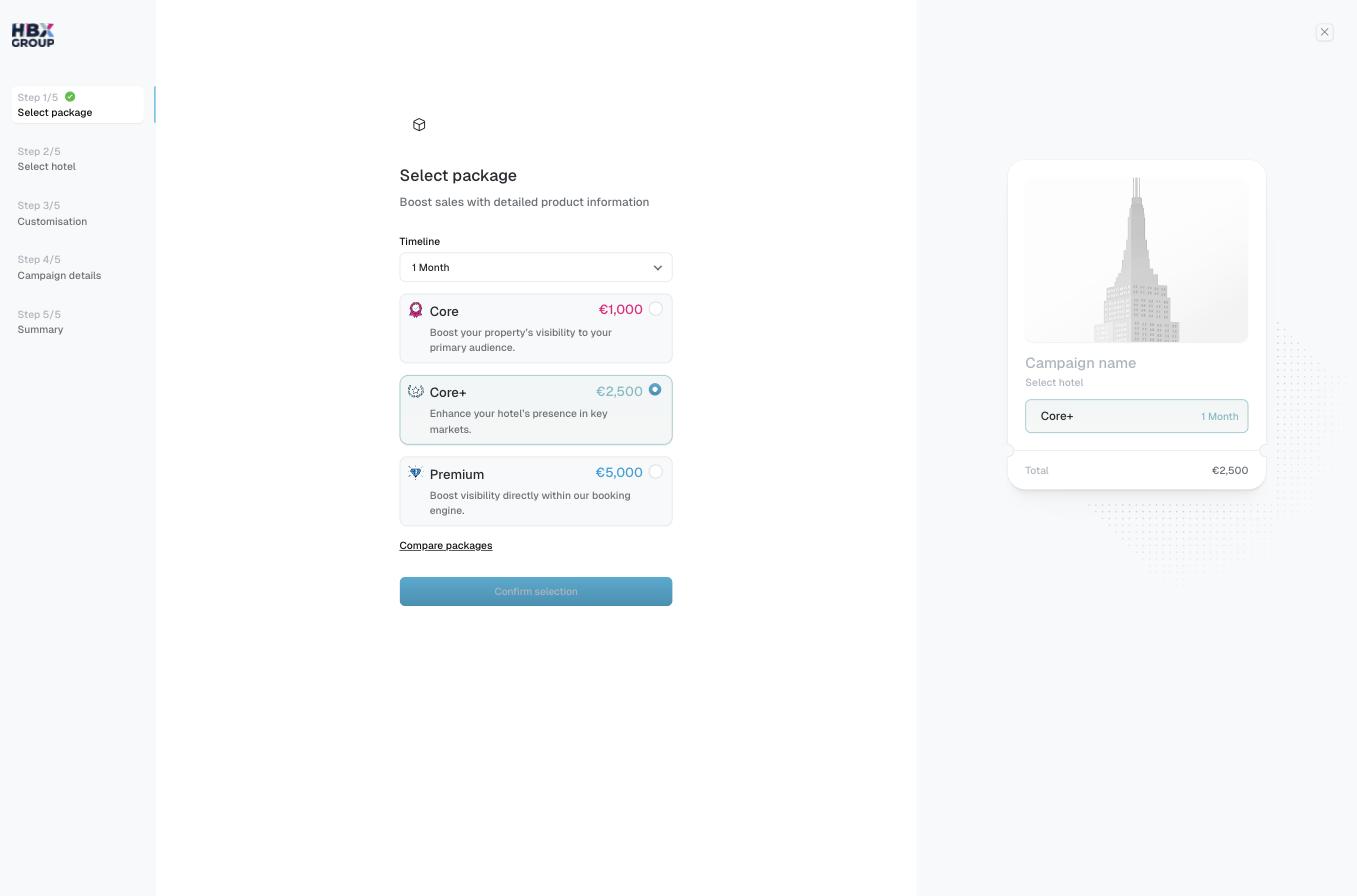
The first step sets the foundation for your campaign: how long it runs and which package it's built on. Your choice here drives the inclusions and the base price shown on the preview card.
Use the **Timeline** dropdown to set the campaign length. Choosing **2+ Months** applies a 25% discount to qualifying campaigns.
Pick **Core**, **Core+** or **Premium**. Each card shows its monthly price and a short description. The selected package is highlighted and its price feeds the running **Total**.
Not sure? Click Compare packages to see a side-by-side breakdown of what each tier includes.
Click Confirm selection to move on to selecting your hotel.
See [Choosing a package](/packages/choosing-a-package) for a full comparison of Core, Core+ and Premium.